1. First sign-in
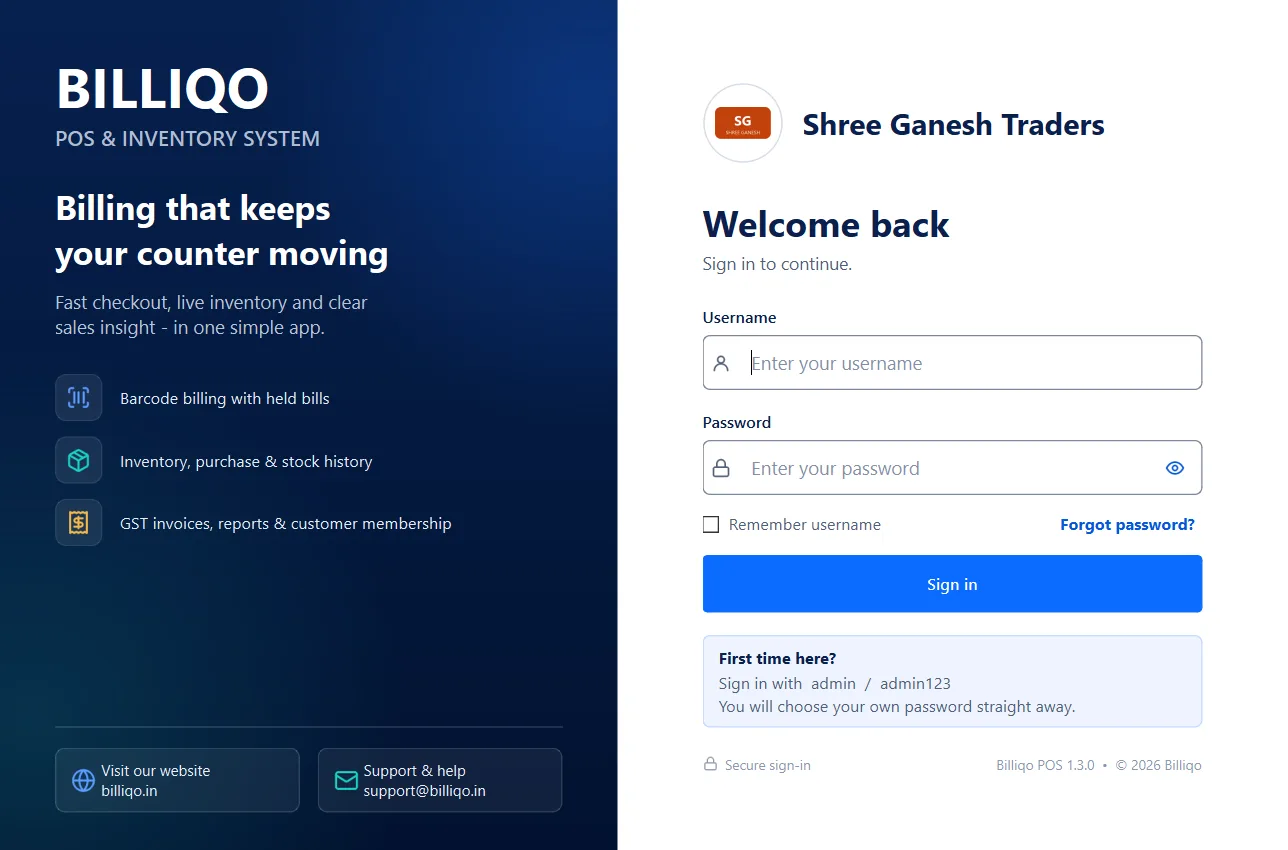
On a new installation the login screen shows the starting account.
- Open Billiqo POS from the desktop or the Start menu.
- Sign in with username admin and password admin123.
- Choose your own password when asked. The default password then stops working.
- Choose Start 15-day free trial, or I have an activation code if you bought a plan.
2. Shop & GST settings
Everything printed on your bills comes from Administration › Settings. Fill in the tabs, then press Save Settings once (bottom right).
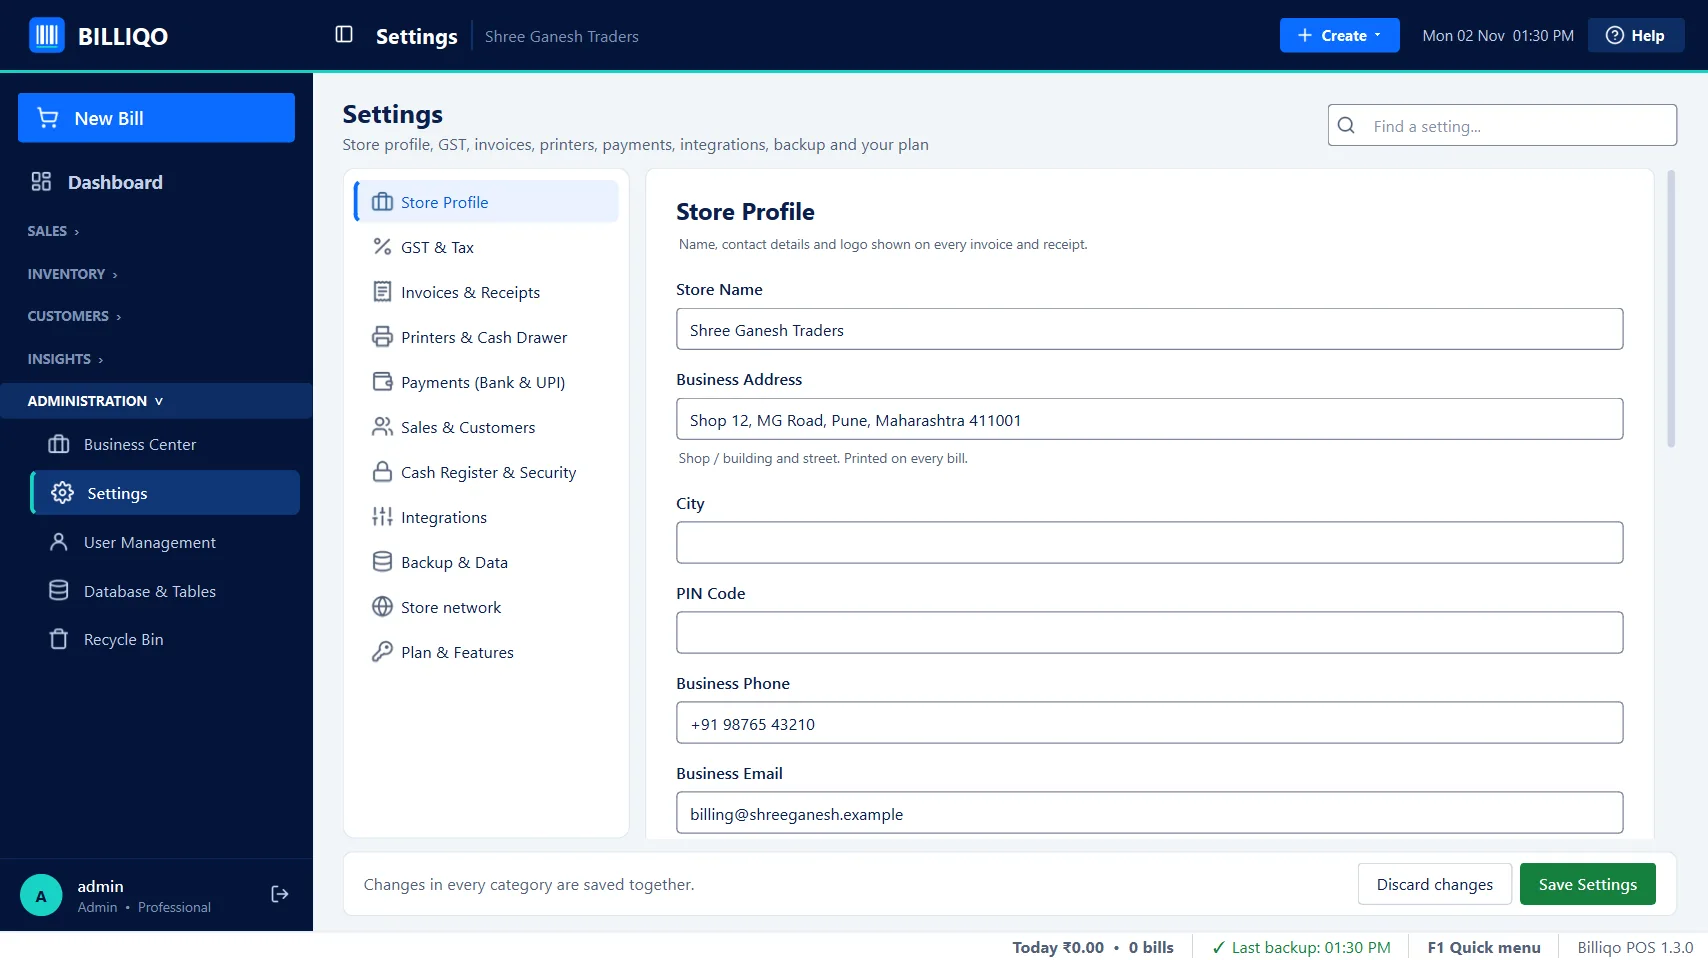
Store Profile and logo
- Open Administration › Settings. The Store Profile tab opens first.
- Fill in Store Name, Business Address, City, PIN, Business Phone and Business Email. PAN, CIN / LLPIN and Udyam number (optional) print in the invoice header.
- Scroll down to Logo, click Browse... and choose your logo (PNG or JPG).
- Press Save Settings.
GST & Tax
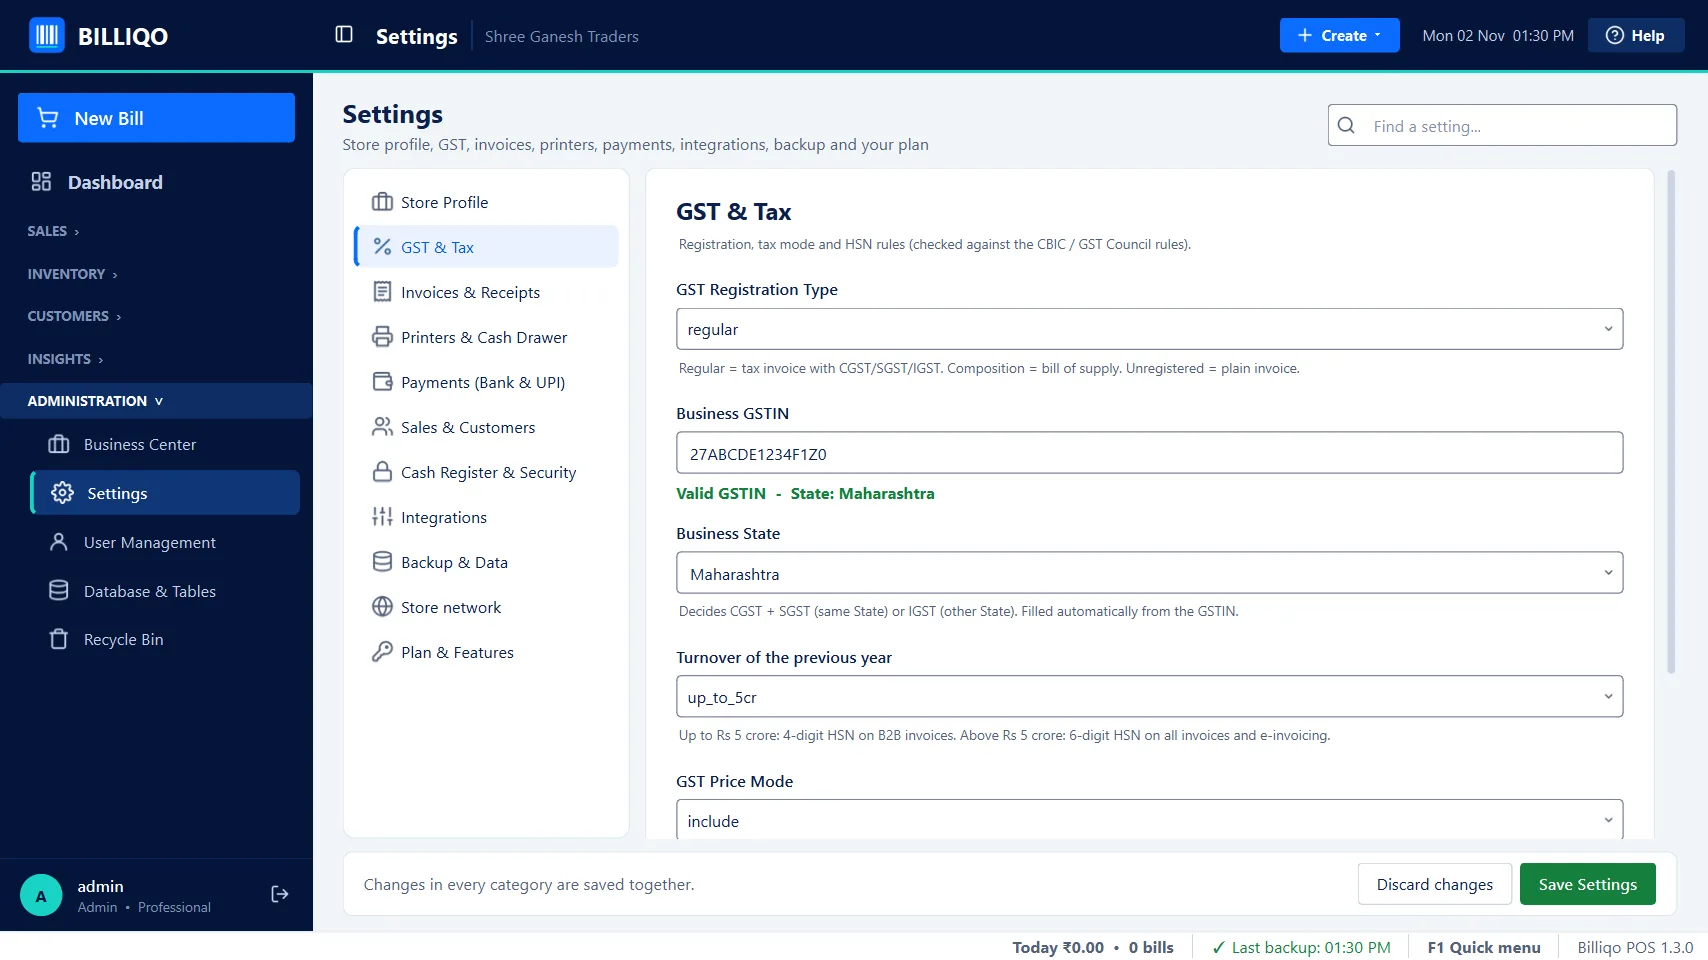
| Setting | What to choose |
|---|---|
| GST Registration Type | regular = Tax Invoice (CGST/SGST/IGST) · composition = Bill of Supply · unregistered = plain invoice |
| Business GSTIN | Your 15-character GSTIN. Billiqo checks it and fills in your State. |
| GST Price Mode | include = your prices already contain GST (usual for shops) · exclude = GST is added on top |
| Default GST Rate | For products without their own GST % (0, 5, 18, 40, 0.25 or 3) |
Invoices, bank and UPI, printers
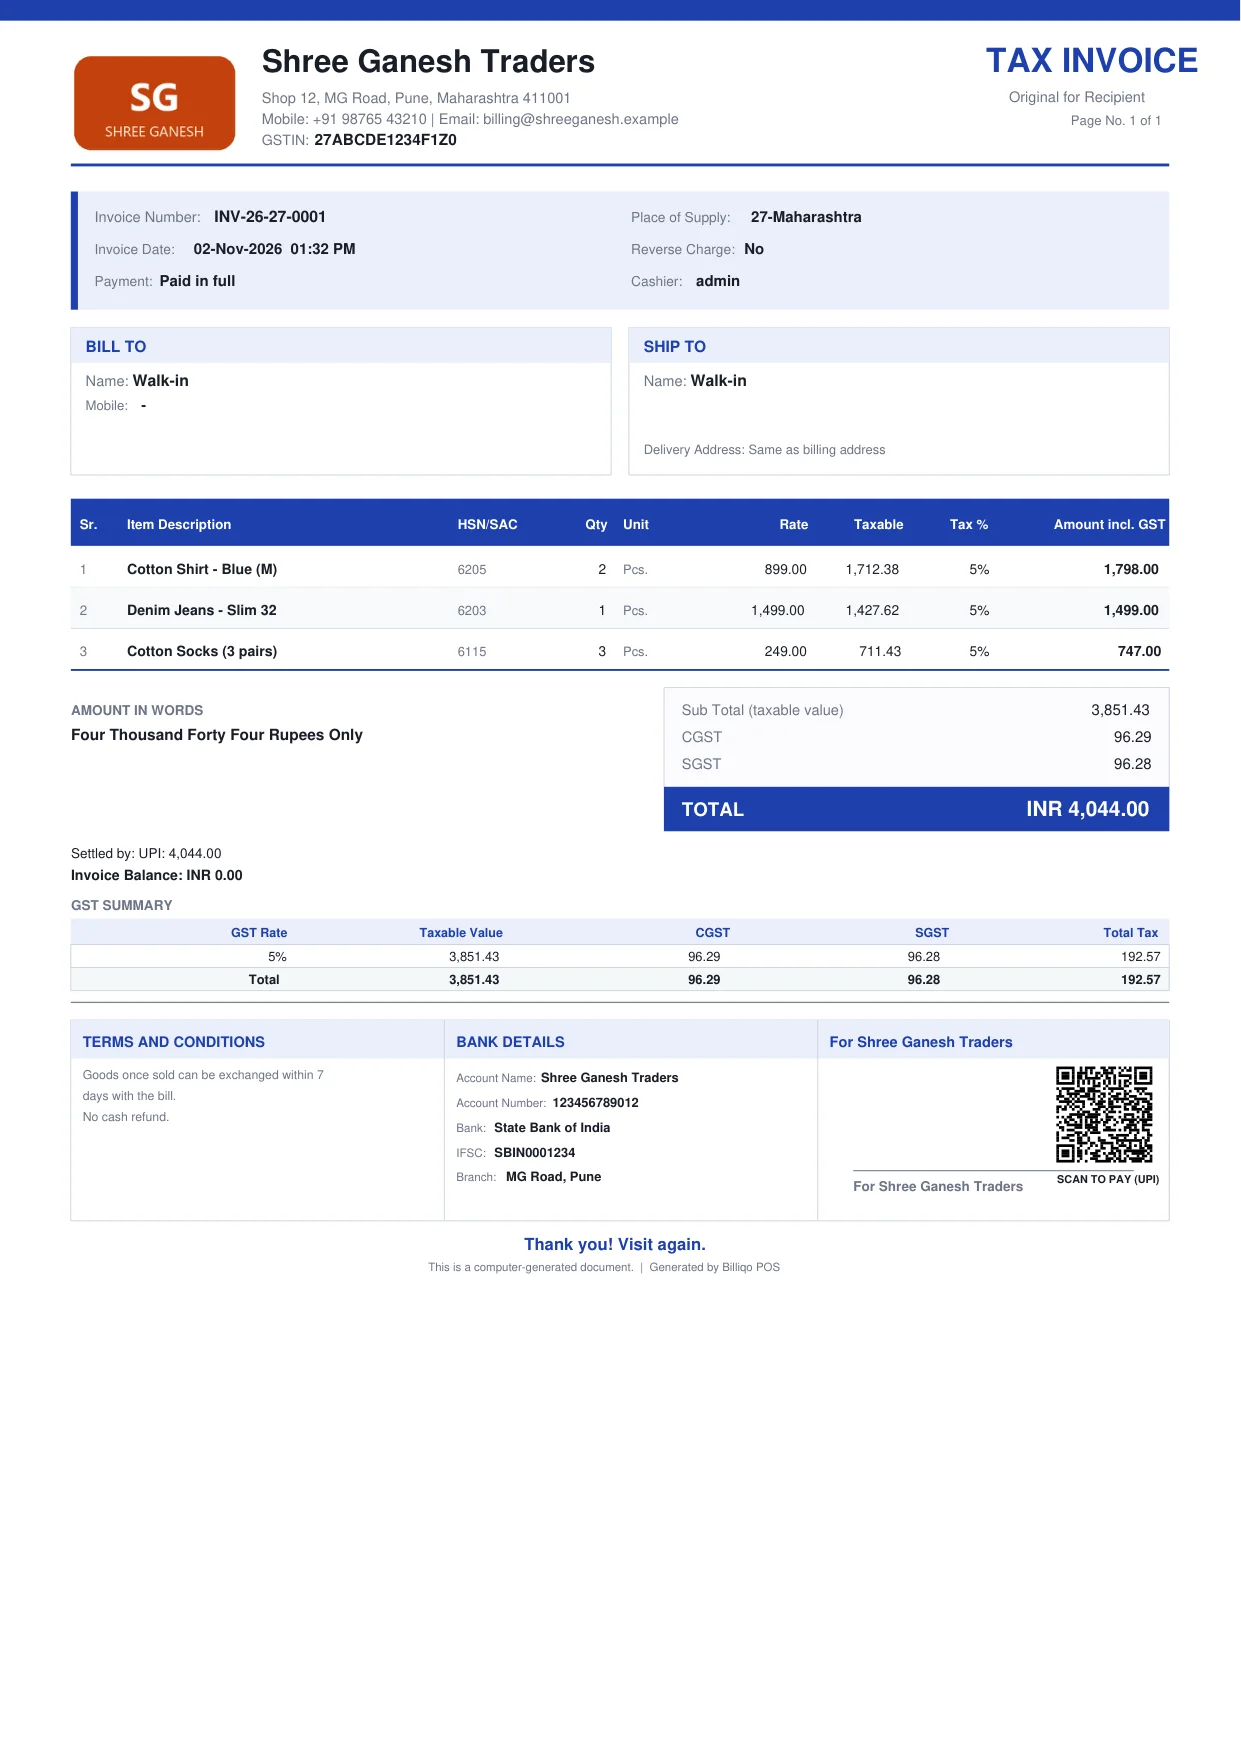
- Invoices & Receipts: copy label, round-off, signature label and signature image, terms (one per line) and the receipt footer. Invoice numbers follow the financial year (INV-26-27-0001).
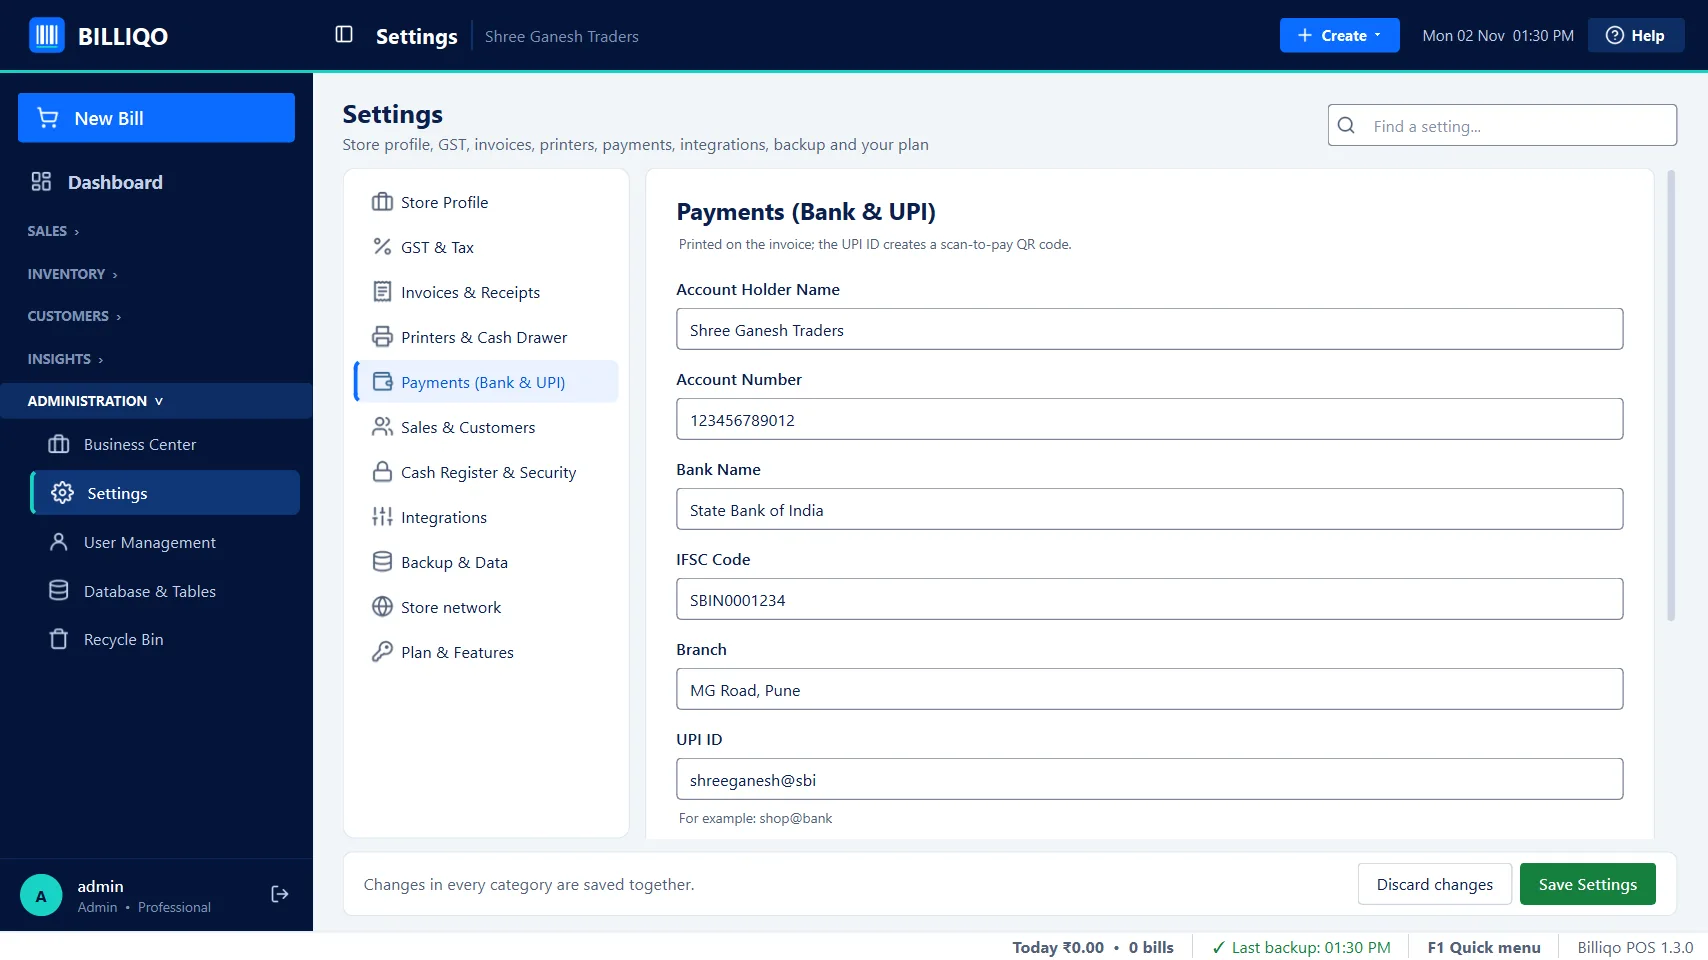
- Payments (Bank & UPI): bank details print on the A4 invoice; a UPI ID adds a Scan to pay QR code with the bill amount. Several bank accounts can be added; the A4 invoice asks which one to print.
- Printers & Cash Drawer: thermal for an ESC/POS receipt printer (cutter and cash drawer work), width 42 for 80 mm paper or 32 for 58 mm.
3. Import your products from Excel
Fill one Excel sheet and load all your products at once.
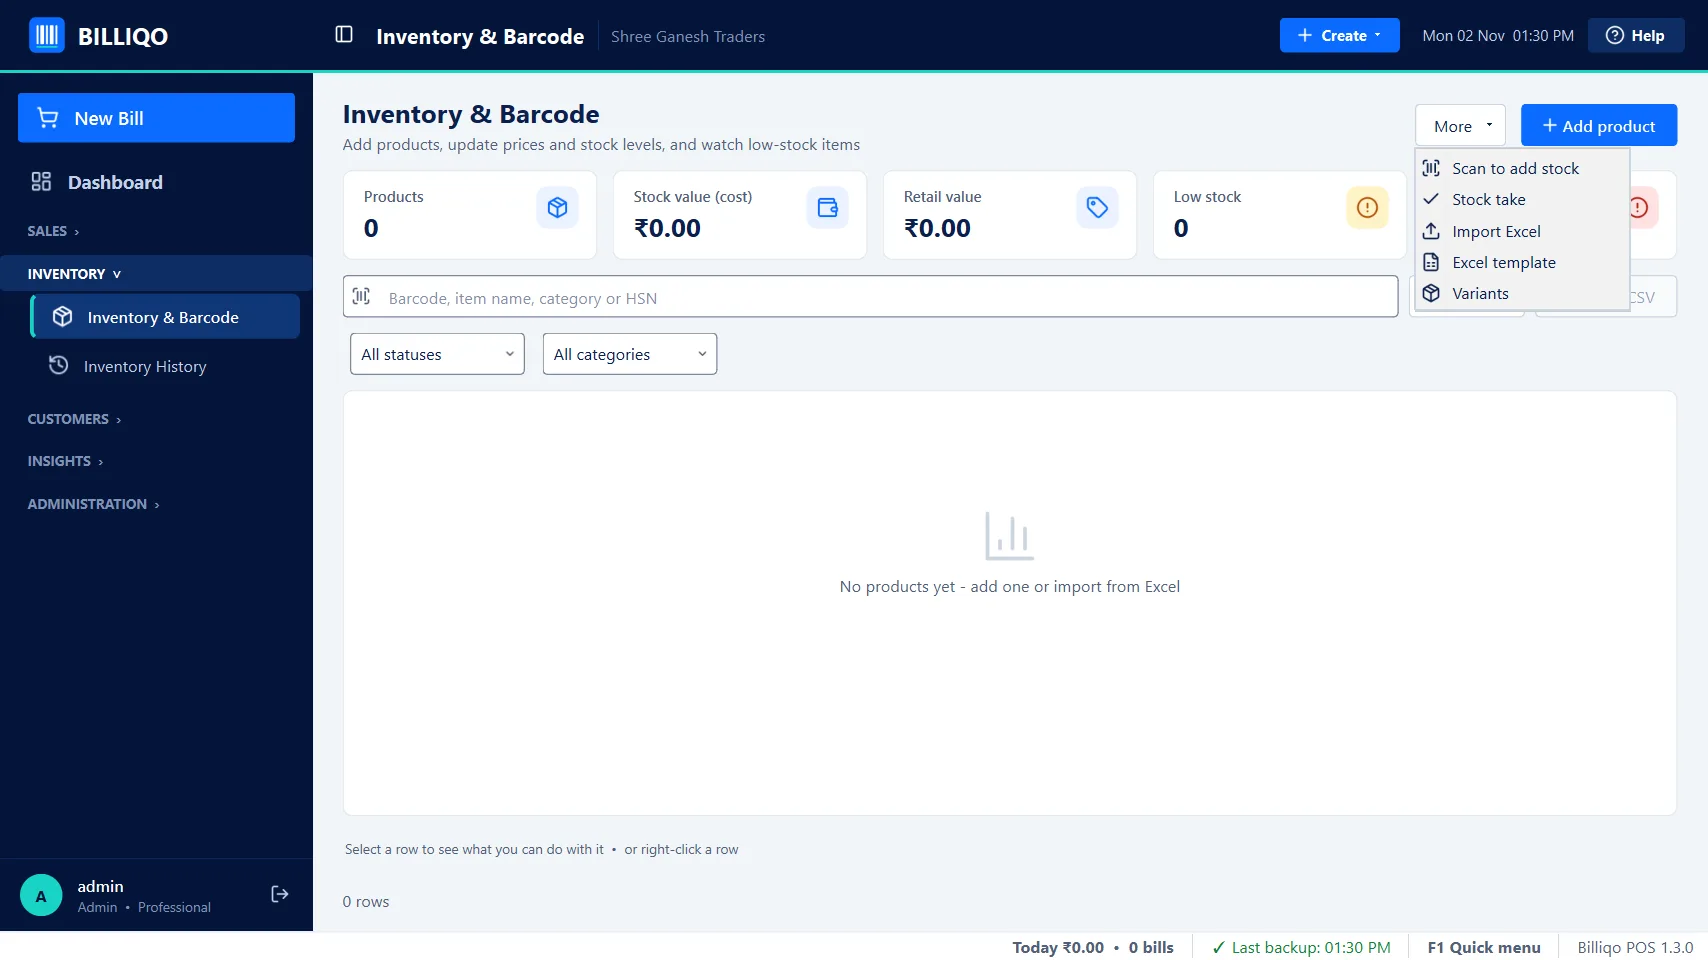
- Open Inventory › Inventory & Barcode and click More › Excel template (or download it here).
- Fill the Inventory sheet: one product per row, keep row 1, delete the 3 example rows. Save.
- Click More › Import Excel and choose the file.
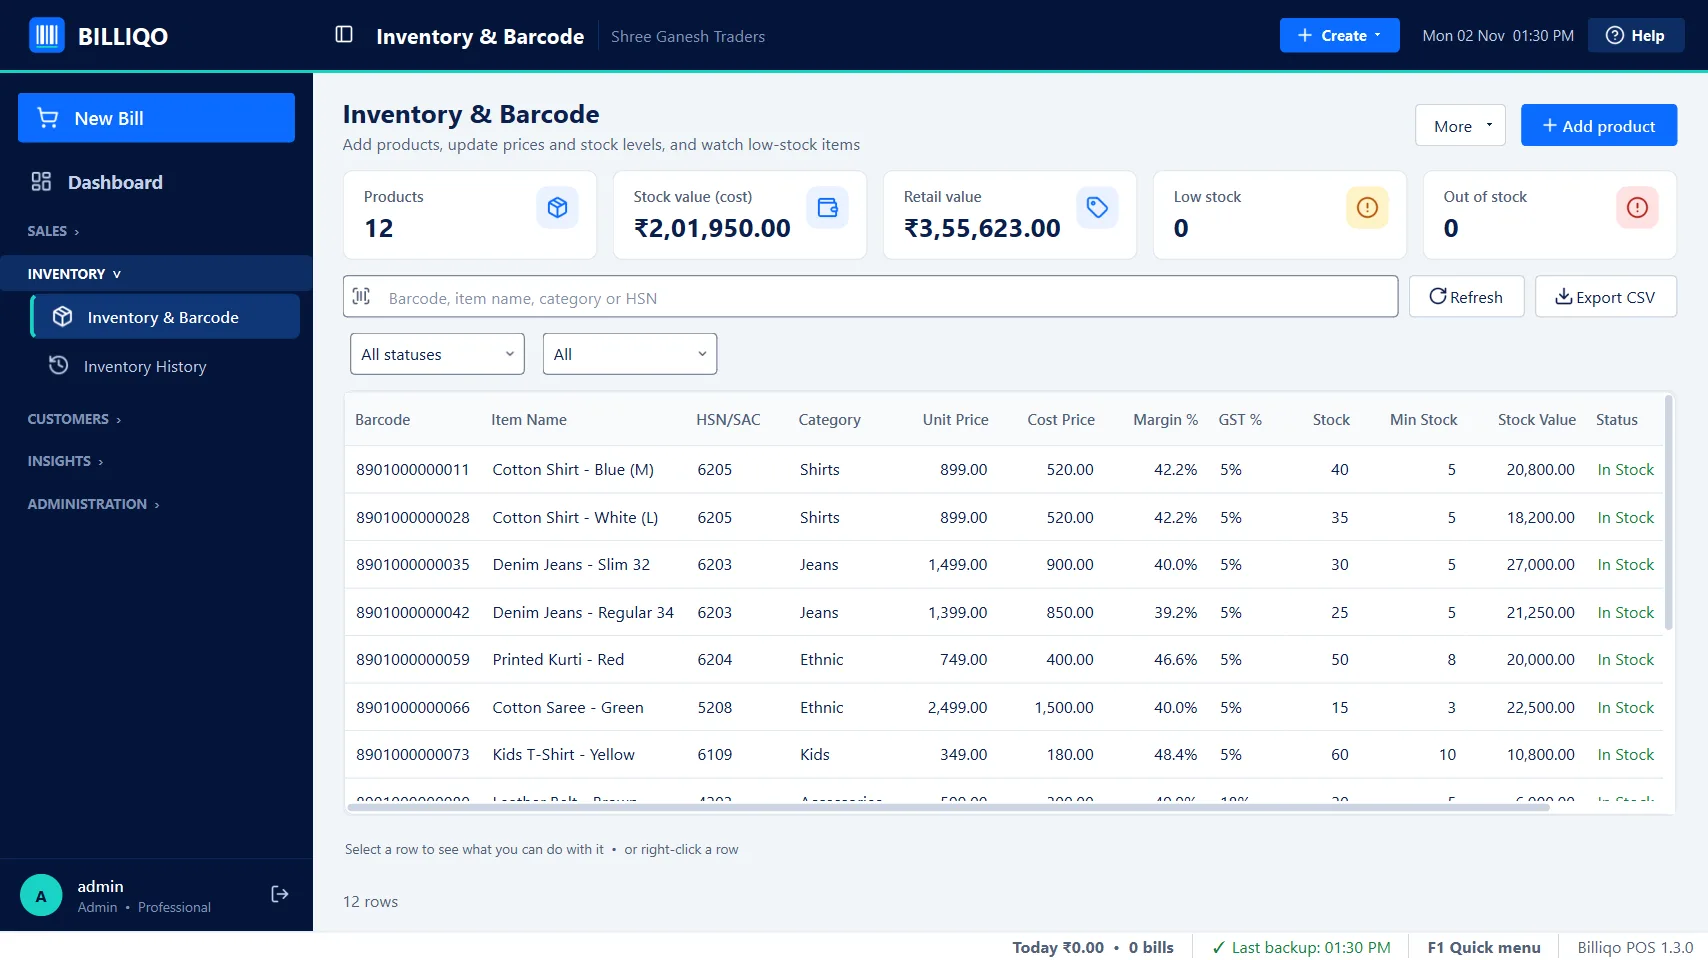
- Billiqo shows a summary, for example Total Rows: 12 · New Products: 12 · Failed Rows: 0. Your products are ready to scan.
| Column | Required | What to enter |
|---|---|---|
| Barcode | Yes | Barcode or your own code; unique |
| Item Name | Yes | Name printed on the bill |
| Unit Price | Yes | Selling price in ₹ |
| Stock Qty | Yes | Opening stock (existing barcode: added to stock) |
| Cost Price | No | Purchase price before GST, for profit reports |
| Tax Rate | No | GST %: 0, 0.25, 3, 5, 18 or 40 |
| Min Stock | No | Low-stock alert level |
| HSN Code | No | 4 to 8 digits |
| Category | No | Any group, e.g. Shirts, Grocery |
4. Make a bill
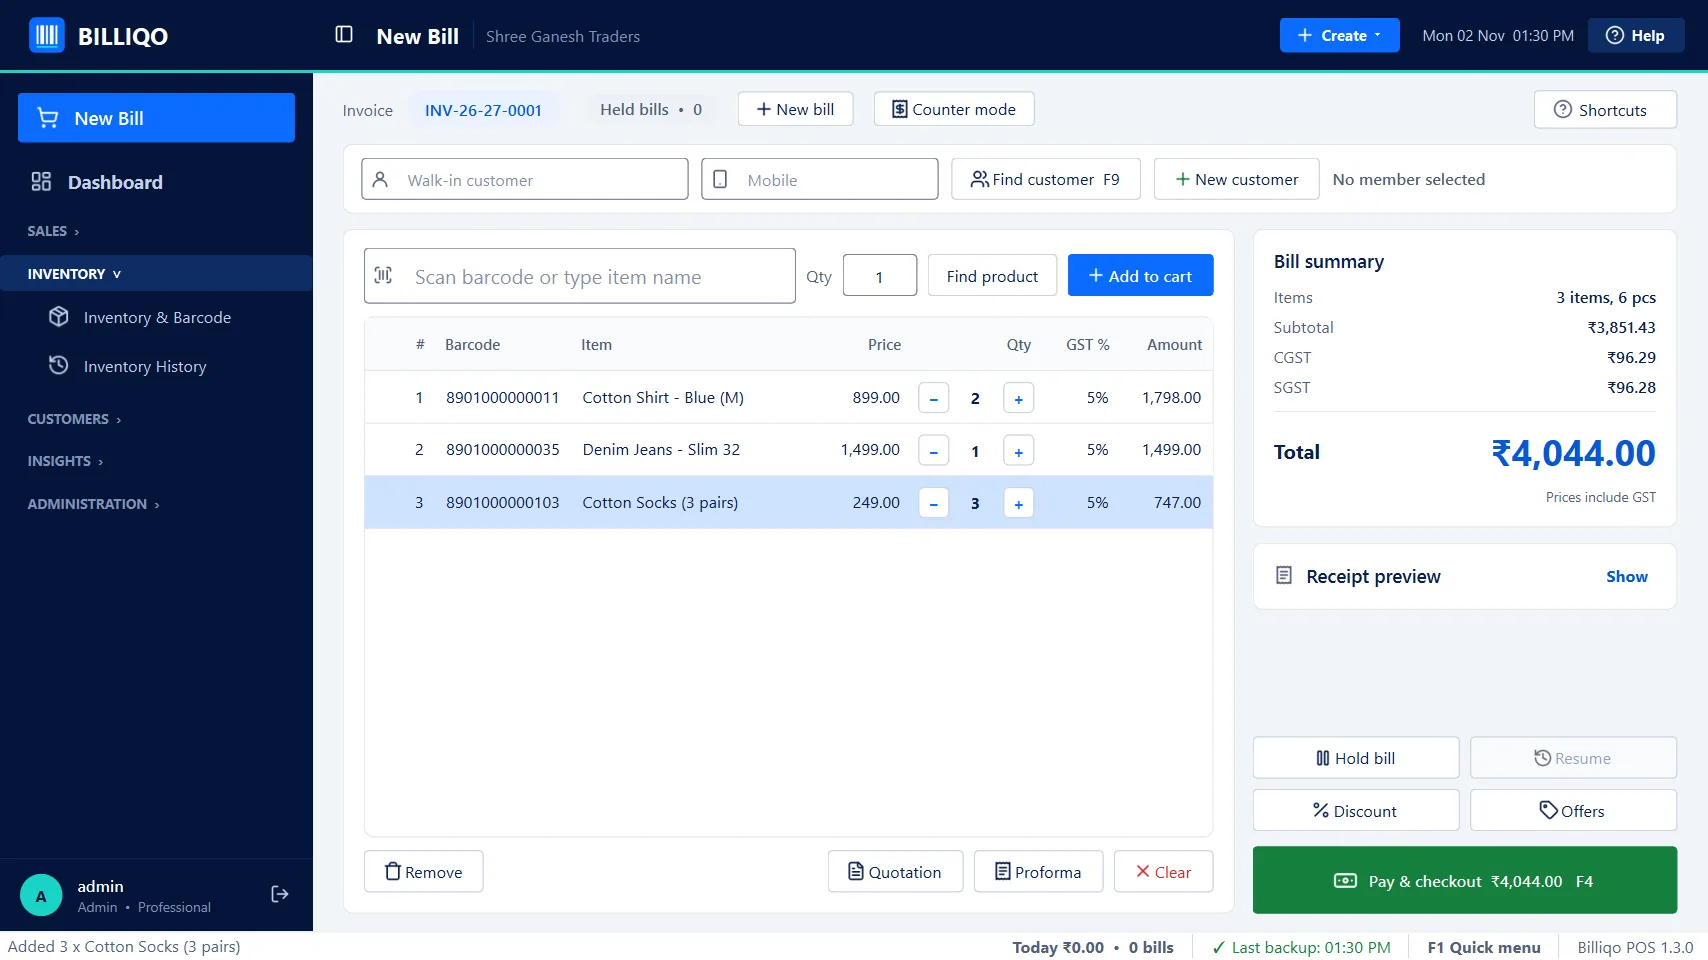
- Click New Bill (top left).
- Scan the barcode, or type it and press Enter. The same item scanned again adds 1. Typing a name shows matching products; Find product searches by name. The – / + buttons in a row change the quantity.
- Optional: Find customer / New customer to put the customer and GSTIN on the bill; F6 for a discount.
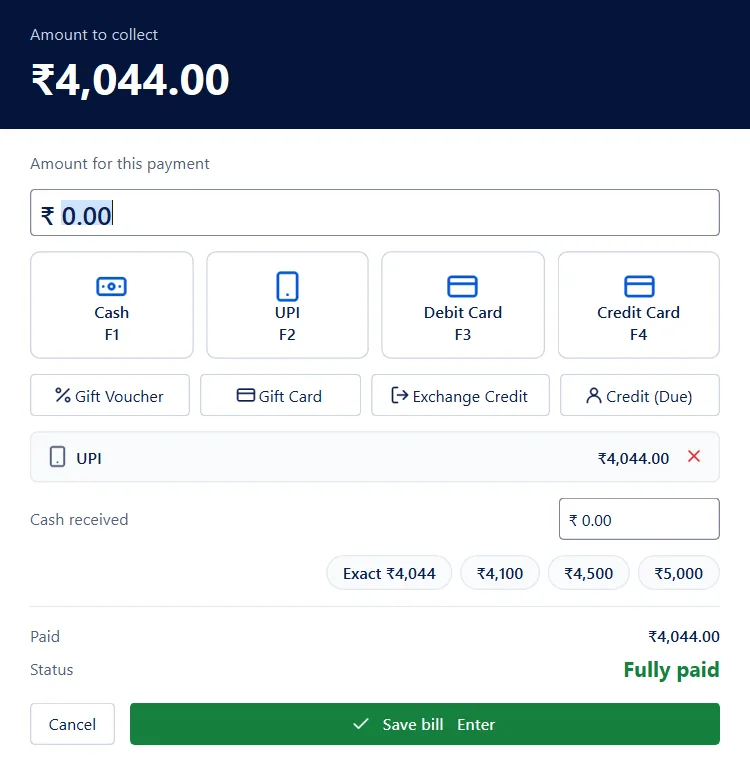
- Click Pay & checkout F4. At the start of the day, answer Yes to open the cash register.
- The amount due is already filled in. Choose the payment method (Cash, UPI, Debit or Credit Card …) (or press Enter for Cash). For cash, type the note received: Billiqo shows Return to customer. For a split payment, type the first amount; the rest is filled in again.
- Press Enter again, or click Save bill. A cash sale is F4, Enter, Enter – or Exact cash F12 without the payment window.
5. A4 invoice, reprint and WhatsApp
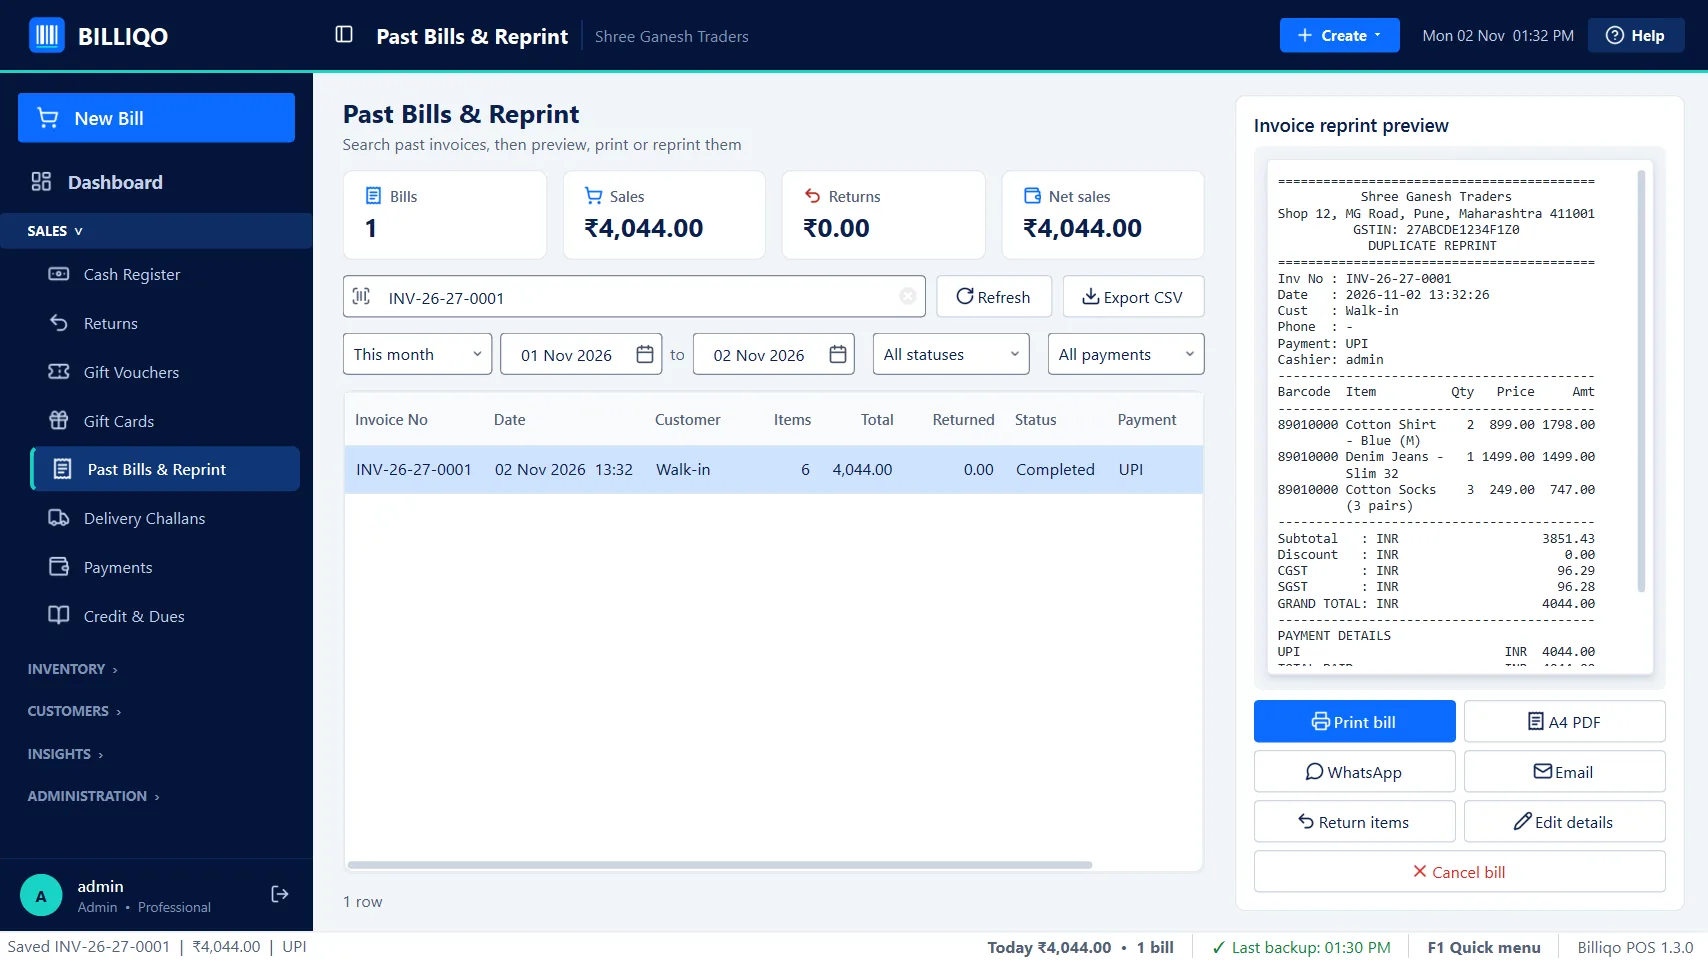
- Open Sales › Past Bills & Reprint and click the bill.
- A4 PDF creates an A4 tax invoice with your logo, GST summary, bank details and UPI QR code.
- Print bill reprints the receipt; WhatsApp and Email send it to the customer.
6. Several counters in one shop
Two or more billing PCs can share the same stock, bills, customers and staff logins. One PC is the store server; the others are counters. Each PC needs its own activation (extra PC). Several counters is part of the Professional plan (and the free trial).
On the store server (main PC)
- Open Administration › Settings › Store network and choose Store server.
- Note This PC's address (for example 192.168.1.10) and the Pairing key.
- Click Save network settings and let Billiqo restart. If Windows asks whether Billiqo may use the network, choose Allow for private networks.
On each counter
- Connect the counter to the same Wi-Fi or network as the server.
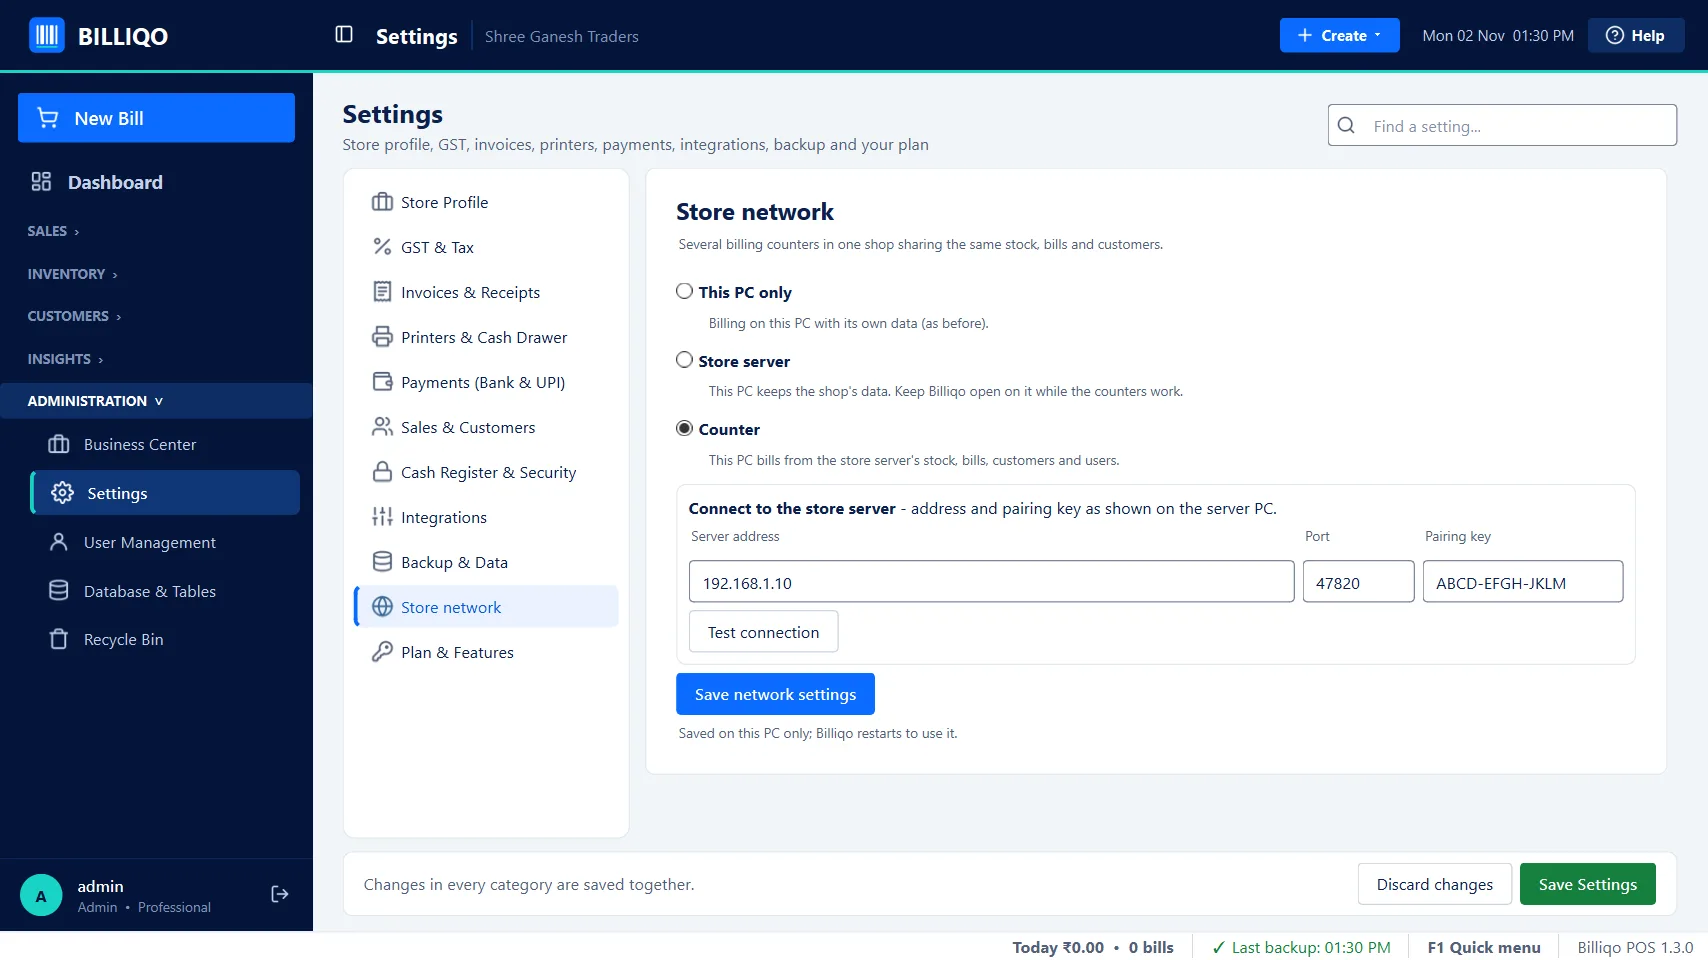
- Open Settings › Store network, choose Counter, type the server's address and pairing key.
- Click Test connection. When it shows ✓ Connected, click Save network settings and let Billiqo restart.
- Sign in with a login made on the server. The status bar (bottom) shows Connected to store server.
Need help?
Bought a plan but the activation code email did not arrive? Get it sent again.
Email support@billiqo.in (we reply within one working day), use the contact form, or message us on Instagram @billiqo_pos.
Screenshots use a sample shop and sample products.